Convert and Import Zimbra TGZ Mailbox to Windows Live Mail EML File format with Single Click of Mouse
Convert and Import Zimbra TGZ Mailbox to Windows Live Mail EML File format with Single Click of Mouse

Convert Zimbra TGZ to EML
Zimbra to Windows Live Mail converter moves all the Zimbra TGZ file data to EML file format without data loss. The application converts everything of Zimbra, i.e. emails, briefcase, address book, notes, etc. without any modification of data.

Export Selective Item Folder
While storing the Zimbra to EML, you can check or uncheck items you want or do not want to export. The application will make a respective folder at the destination by storing all TGZ data in EML file format. For every mailbox, there will be a separate folder in which items will be saved.

No File Size Limitation
TGZ to Windows Live Mail converter migrates all the data to EML file format without importing any file size and content length limitation. The application converts unlimited amount of data to Windows Live Mail without any issue.
Zimbra Migration Tool makes easy for users to perform conversion from Zimbra TGZ data files to EML file format in precise form. If the user tries to convert .tgz file without Zimbra on their system it is difficult for them to perform conversion of such huge amount of data at once, as there is no manual procedure available. However, with the help of this accurate solution to open, preview, and explore all Zimbra files in Windows Live Mail easily. Moreover, the utility comes up with an option to store all the data at desired location on the machine. The software gives an option to choose the desired file naming option to store the converted data files. While converting the Zimbra data files, it is guaranteed that the data originality is preserved in exact form.
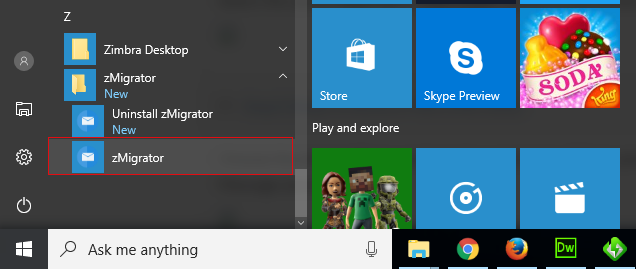
Go to Start << All Programs << Zimbra to Windows Live Mail Converter
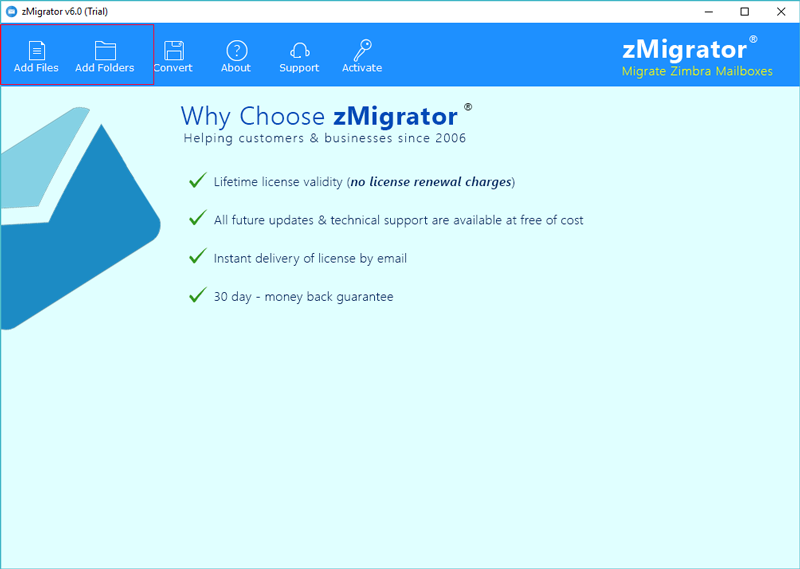
Hit on the Add File or Add Folder button to go to the location where the source TGZ file is saved on your system.
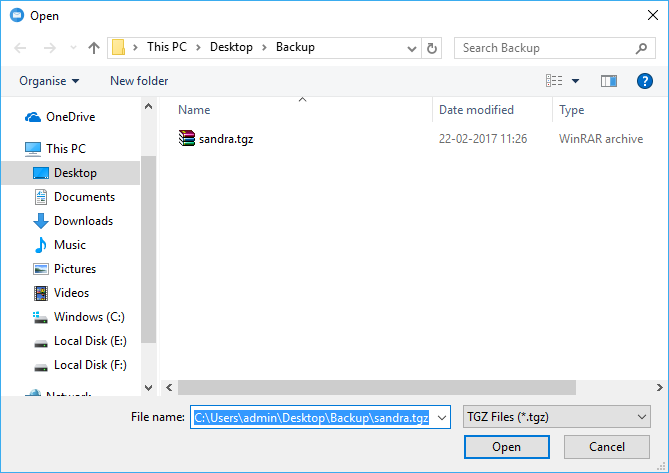
Browse the stored location, Choose TGZ file and then click on Open after authorizing the TGZ file to be loaded.
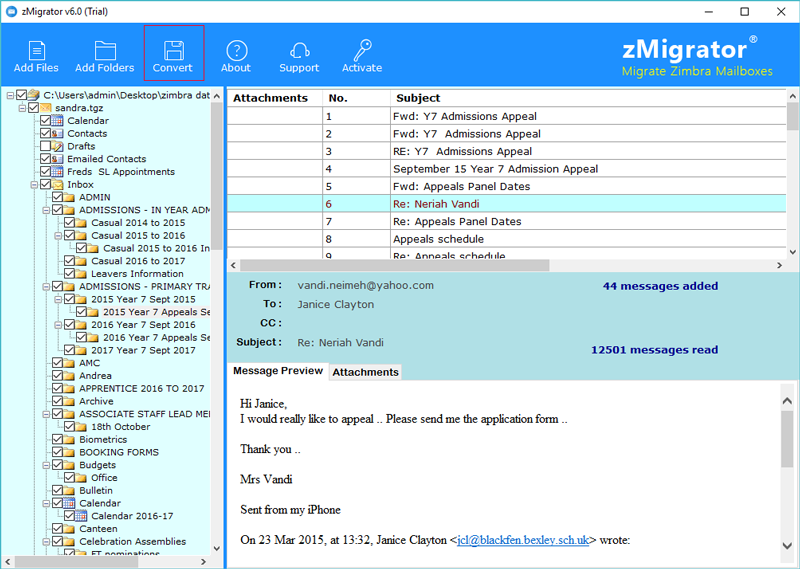
Get the TGZ file stored items displayed, in the left panel of the software screen. To view the data in details, double click on that items and read it on the right panel.
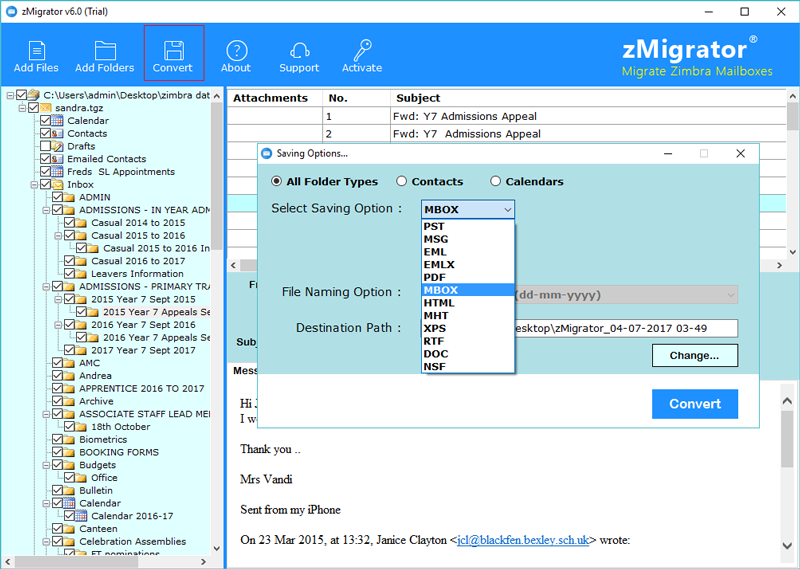
Now, click on the Convert button to start the conversion procedure.
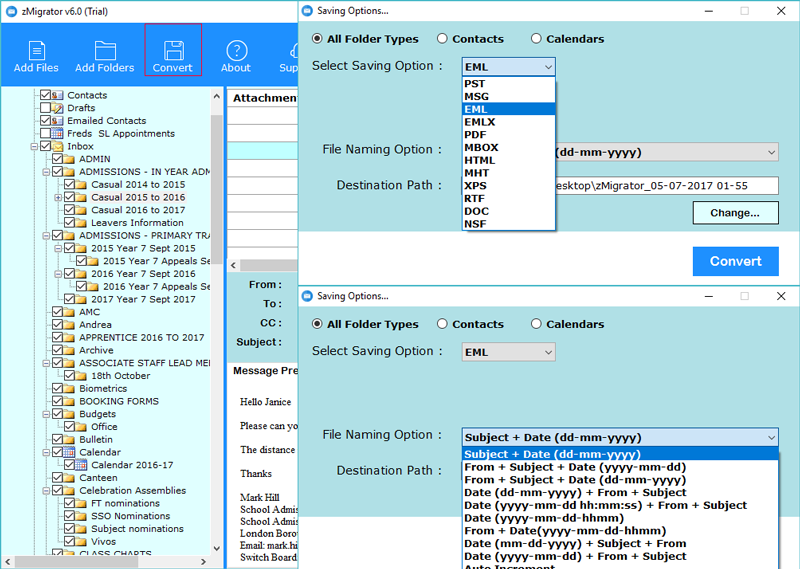
After that, choose the EML file format to store the converted data files in Windows 10 Mail file format. Select the Destination Folder and desired Naming Convention to store the data files. Click on Convert button to proceed further.
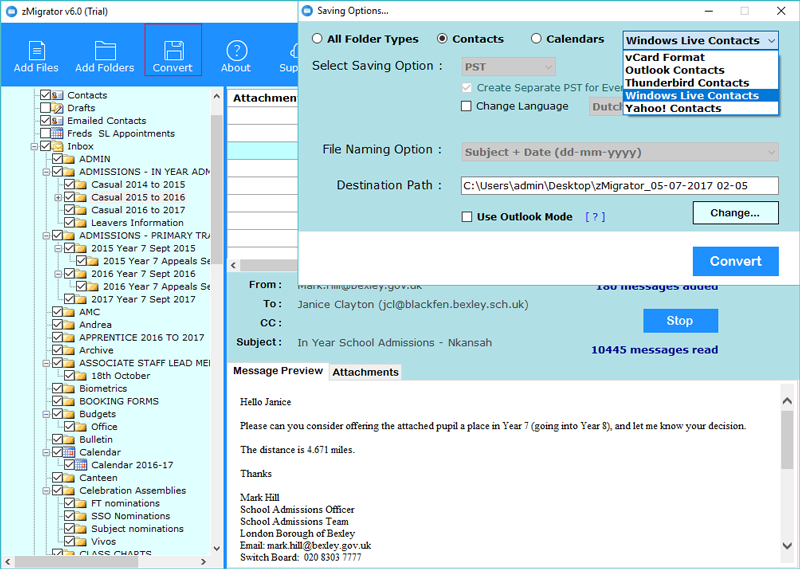
Zimbra to Windows Live Mail Migration Tool also offers an option to import Zimbra contacts to Windows Live Mail separately by following given steps.
Once the conversion is completed, the utility will give the completion message.

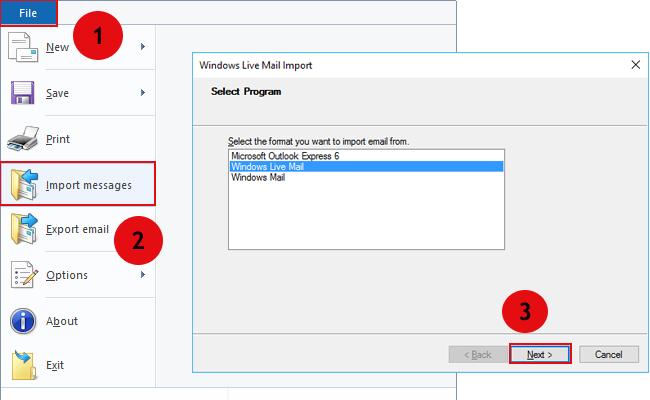
Run WLM email client and choose File << Import Messages << select program Windows Live Mail << Press Next to continue the process as showing in screenshot.

Daniel McGruff, Russia
" Windows 8 Mail files were all that we required the only difference was no negotiation was expected to be made with our Zimbra desktop database. Hence, we planned to utilize the third-party utility and select Zimbra to Windows Live Mail Converter and we are glad that we did! Thank you so much. "

Julie Pierce, Los Angles
" There were the times when we had to utilize the defective software while looking out for a genuine solution for TGZ to EML conversion. However, Thanks to my client, Zimbra TGZ to WLM Converter was introduced and we are thankful to the developers as well for making this friendly and completely precise program. "
Yes, you can move single as well as multiple mailboxes from TGZ file irrespective of its size to EML file format.
Yes, this product is completely well matched with all Windows editions including Windows 10. Moreover, it supports both Windows 32-bit and 64-bit.
Yes, you can convert all data items from TGZ file such as; emails, attachments, address book, calendars, notes, etc.; to .eml format.
No, You can convert TGZ mailbox to EML format even without having Windows Live Mail installed on your system. However, for viewing the converted mailbox in EML format; WLM installation is essential.
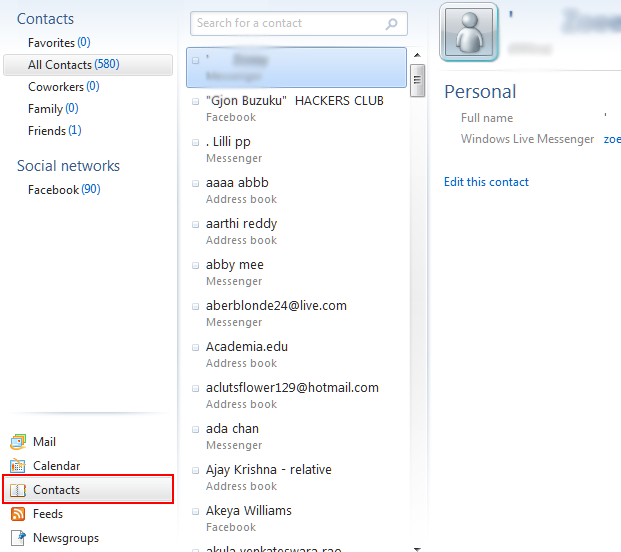
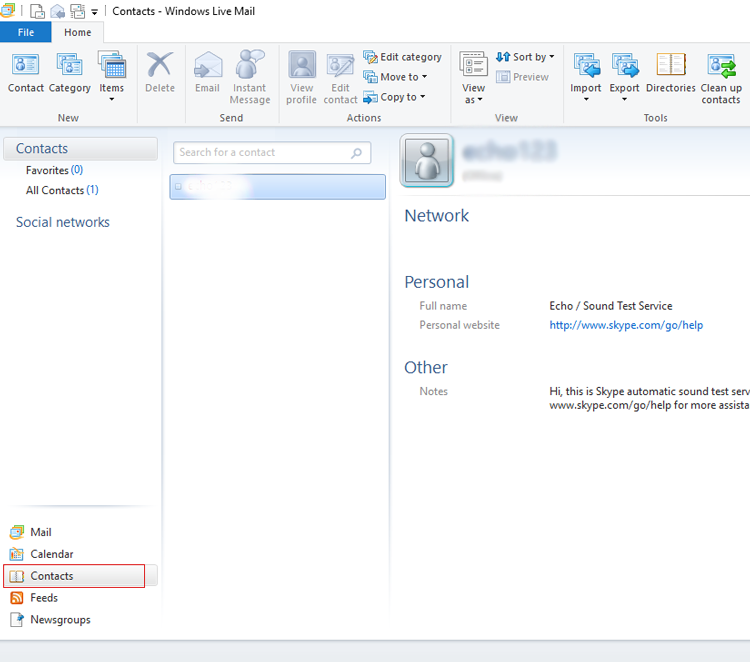
Step by step process to import contacts to Windows Live Mail with suitable screenshots.
Step 1: — Run Windows Live Mail email client and select Contacts option
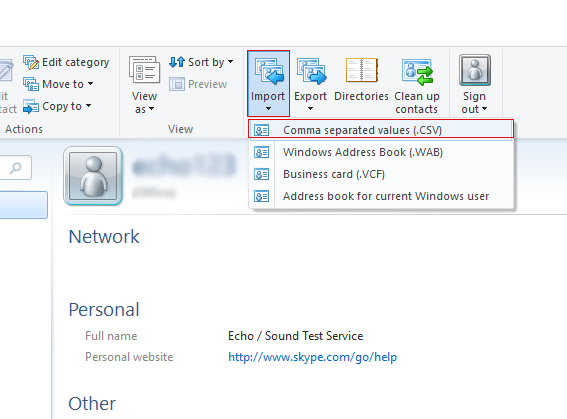
Step 2: — Select Import << Comma separated values (.CSV)
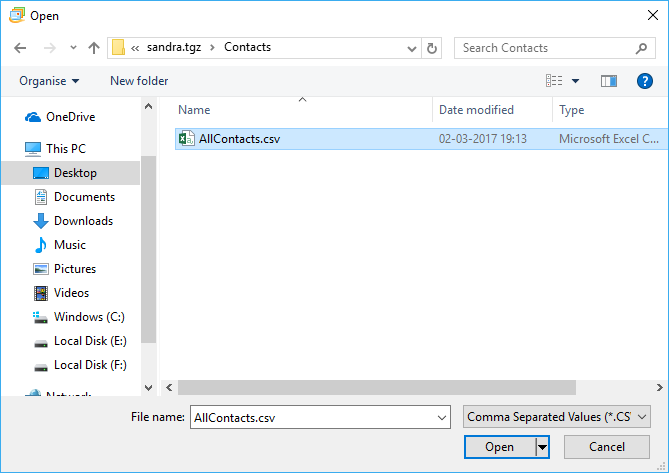
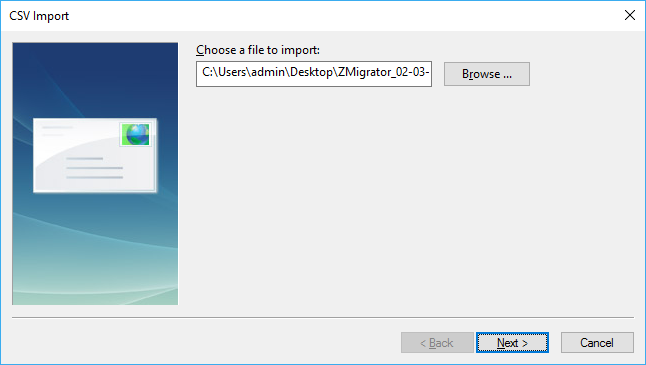
Step 3: — Choose a file to import by selecting Browse button

Step 4: — Select resultant contact file from your computer, Open it
Step 5: — Click on Next to continue the import contact process
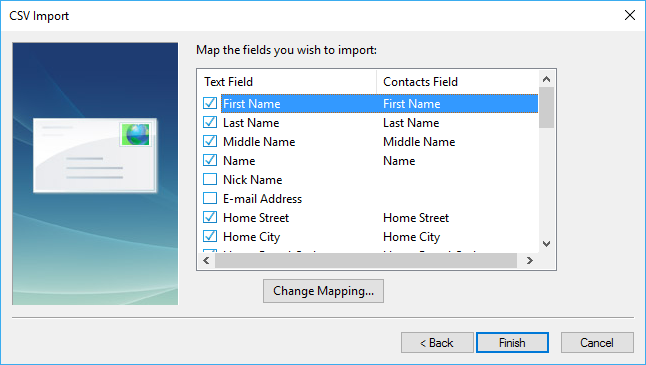
Step 6: — Map the fields you wish to import and click on Finish button
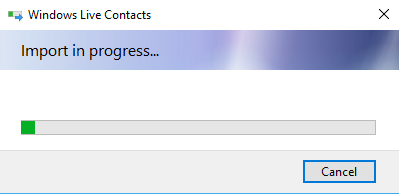
Step 7: — Import in progress, please wait
Step 8: — Now users can view their converted contacts into Windows Live Mail